Guide to Completing Your Timecard
Step 1.
Login to your timecard using the URL and password that has been sent to you. You can login using your smart phone, tablet or laptop/desktop. (Click here to login) If you haven’t received your timecard, contact timecards@andersgroup.org, who can resend you the login details.
Step 2.
Once logged in, check you are on the correct week to enter your time. Click on the date range to change the work week if needed. See yellow highlighted area in screen shot.
Desktop
.jpg?width=500&height=336&name=Stephen%20Photo%20(6).jpg)
Mobile
.jpg?width=406&height=500&name=Stephen%20Photo%20(1).jpg)
Step 3.
You will need to enter time for each day of the week you have worked. Your regular hours will be entered into the regular task. If you completed overtime, this will be calculated automatically once you click save on the save button.
Desktop:
Mobile:
.jpg?width=622&height=684&name=Stephen%20Photo%20(2).jpg)
.jpg?width=488&height=772&name=Stephen%20Photo%20(3).jpg)
Step 4.
To enter time, you can use military format or AM/PM Example 0715 or 07:15 AM, you must enter a “Start Time” and “End Time” for each entry and then Click “OK” to save. To edit time entries, click “Reset to “0” first, then enter the updated time.
Step 5.
Based on your contract and the state you work in, there may be additional tasks that you can enter time for if you qualify or completed this type of tasks, for example “On Call”, “Call Back”, “Holiday”, “Call Back Minimum”. Please contact timecards@andersgroup.org if you have any questions.
Step 6.
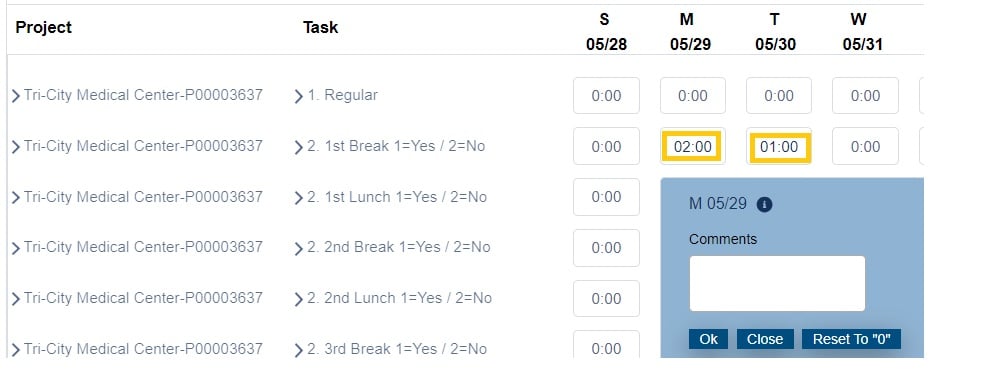
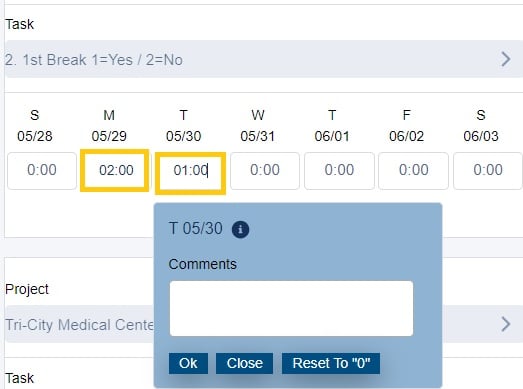
The State of California requires ALL breaks and lunches to be recorded on your timesheet. There is an additional task for this specifically. When you select "1" or "2" it will look like "1.00" or "2.00", this is not calculating an actual hour, it is YES or NO. Failure to record breaks/lunches may result in a timecard rejection as well as a delay in pay. Consistent timecard violations can result in termination of contract. Please click on the link below for rules and regulations regarding breaks and lunches in California: https://www.andersgroup.org/CA-Break-Law.
Desktop:

Mobile:

Step 7.
Once you are finished click “Submit for Approval”, or “Submit” button if you are on a smart phone.
Desktop:
Mobile:
.jpg)
.jpg)
Step 8.
Once you click "Submit", a pop-up will appear. Enter your name and click "OK". You will no longer be able to make changes for that week. If you need to make a change, contact timecards@andersgroup.org who can unlock your card.
.png?width=1000&height=356&name=Stephen%20(7).png)
If you have further questions, please visit our Timecards FAQ page. If you are needing expenses reimbursed, you can also visit our Uploading Expenses Guide


.png)